

Bread is something that even experienced chefs are weary to try, because it’s a process that has always been somewhat intimidating. It’s a very scientific process, but that doesn’t mean it’s extremely difficult. In fact, it’s fairly easy to turn out a decent loaf of bread that will be world’s better than anything you’ll find on a grocery store shelf. It’s also extremely cost effective to make your own bread, as it’s one of those staples that you probably always have on hand.
Read on to learn what you need to get started, and before long, you’ll be making your first loaf of hot, warm bread.
Tools and Equipment
You probably have everything you need in your kitchen to make a decent loaf of bread, but there are a few things that will definitely make the process easier.
While kneading bread by hand is doable, a good stand mixer with a dough hook will definitely help you get the job done faster, and your arms won’t be as tired. With a mixer, you can put the ingredients in your mixing bowl and walk away to do whatever else you please. It’s an investment for sure, but any serious bread baker will tell you that to try to bake really good bread without one is difficult.
While you probably have mixing bowls in your kitchen, bread making generally requires extra large bowls. This gives the dough plenty of room to rise.
A digital scale is handy to have around if you want consistent results. No matter how carefully you do it, you’ll rarely have the exact same amount of flour if you use measuring cups to measure.
Smaller, yet still important tools include a bench scraper and an instant read thermometer. Nothing quite slices through bread dough the way a bench scraper does, and it also makes cleaning flour and scraping bits of dough from the counter a breeze. An instant read thermometer is key to telling you when your bread is done. Experienced bakers can tell by sight, but it can take a while to get there.
A baking stone (also called a pizza stone) is good for mimicking that taste and texture that comes from baking bread loaves in hot brick ovens. It’s as close as you’re going to get to professional results at home. You don’t need bread pans if you’re looking to make crusty artisan bread for dipping or sopping up sauce; you can bake the loaves directly on the stone.
If you want traditional soft loaves for sandwiches or toast, you will need bread pans, however. Heavy, dark metal pans are best for browning the crust and creating perfect loaves. Having two pans may be helpful since many recipes will yield two loaves.
Ingredients
The best bread is made of four simple ingredients: Flour, salt, yeast, and water. Depending on the bread you’re trying to make, you can add other ingredients. Olive oil, sugar, herbs, spices, cheese, or olives all make for delicious breads.
The type of flour you use is important. A good bread flour will make your loaf soft, yet still slightly chewy. Whole-wheat flour will make a much denser bread, so you’ll probably want to add sugar to soften it up.
Yeast is what makes your bread rise. Many professional bakers swear by fresh or cake yeast, but it’s hard to find and doesn’t have a long shelf life. The instant yeast you find in your bakery aisle at the supermarket will be just fine for baking any yeast-raised bread you want to try.
You can add any type of ingredient you want to your bread, but like everything, the higher quality your ingredients, the better your finished product will be. Once you’ve got the process of baking down, you can experiment using whatever you like: herbs, dried fruit, nuts and seeds, or vegetables all make unexpectedly good breads.
Proofing
This is the part of the bread making process that will give you that incredible yeast like flavor that takes bread from good to great. It’s the longest part of the process, but also the easiest.
The best way to get good flavor for your bread is a long, slow rise, preferably in the fridge. While you can bake your bread within a few hours of mixing, you’ll have much better benefits if you refrigerate the dough overnight and then let it rise again before baking.
The time it takes to rise depends on many factors; the type of bread, the heat and humidity of your kitchen, and even the weather can all make a difference. You can speed it up by putting it in a really warm place (such as the top of the fridge), but unless you’re in a hurry, it’s best to just set it in a draft free area and let it do what it’s supposed to do.
How will you know when it’s ready? Experience is the best way to learn exactly when to put your bread in the oven. For the most part, your bread dough will have risen to about twice its original size, and will be slightly soft when you touch it, and not quite so springy. You don’t want it to deflate; that means it’s over proofed.
Baking
When you put your bread in the oven, you don’t want to open it for at least half of the baking time called for in the recipe; doing so can cause it to deflate. If you have a baking stone and peel (or the back of a baking sheet), you can sprinkle corn meal on your peel so your bread doesn’t stick (or use parchment) and slide it onto the stone. Make sure you put your stone in the oven when you turn the oven on so that it’s good and hot when you put your bread in the oven.
Your recipe will likely have a time listed; use this as a guideline. To test for doneness, insert an instant read thermometer (the kind you would use for meat) in the thickest part of the bread. It should read about 200 degrees when it is done. You can also test for doneness by tapping on the bottom of the loaf; if it sounds hollow, it’s done.
Eating and Storing
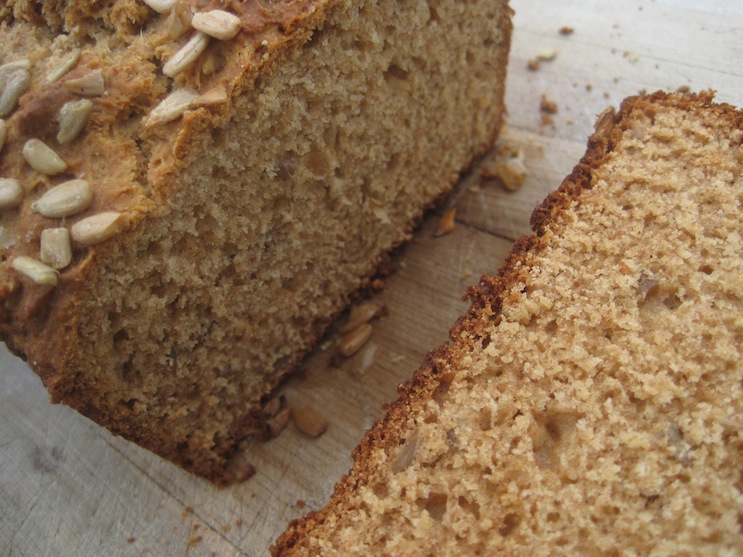
Although tempting, you should always wait for your bread to cool completely before slicing. This gives it a chance to finish cooking so that you’re bread isn’t soggy when you slice it.
Unless you are going to freeze it, you should slice your bread as you use it. For crusty bread, slice it and leave it cut side down on your cutting board. This will keep the crust nice and crisp. Wrap softer breads in plastic or put in a plastic bag, but only once they are cool. Enclosing warm bread in plastic will make it soggy.
While most bread freezes beautifully, you should not store it in the refrigerator, as this will dry it out. You should plan on eating a home baked loaf within a couple days, as without the preservatives in store-bought bread, it generally doesn’t last as long.
Conclusion
Baking bread doesn’t have to be the time consuming, labor intensive process you might think it is. If you plan enough time for rising, it can actually be something that is fun, interesting, and delicious.